by Kathy Douglas | Jan 12, 2015 | Appetizers
Here is a quick and easy recipe for Super Bowl Sunday eats. Using minimal ingredients, these oven roasted wings deliver big on flavor. Sprinkle the wings, fresh from the oven, with fresh chopped cilantro and have some cool sour cream ready to go on the side for dipping.
Ingredients:
2 tablespoons Chinese Five Spice
1/2 teaspoon cayenne pepper
1 teaspoon Kosher salt
Fresh ground pepper
40 chicken wings
Canola Oil
Fresh Cilantro, chopped
Sour Cream
Instructions:
Preheat the oven to 500 degrees. Mix the Chinese Five Spice and the cayenne pepper in a small bowl with 1 teaspoon of salt and a few grinds of black pepper. Place the wings in a large bowl, sprinkle the spices over the wings then toss and rub the wings until all the loose spices are incorporated into the chicken. Place a wire cooling rack over a foil lined sheet tray. Lightly brush the rack with canola oil. Put the wings on the rack with the skin side up. Roast until cooked through, about 25 minutes. Place on a platter and top with chopped fresh cilantro. Serve the wings warm with a side of cool sour cream for dipping.
by Kathy Douglas | Dec 2, 2014 | Holiday
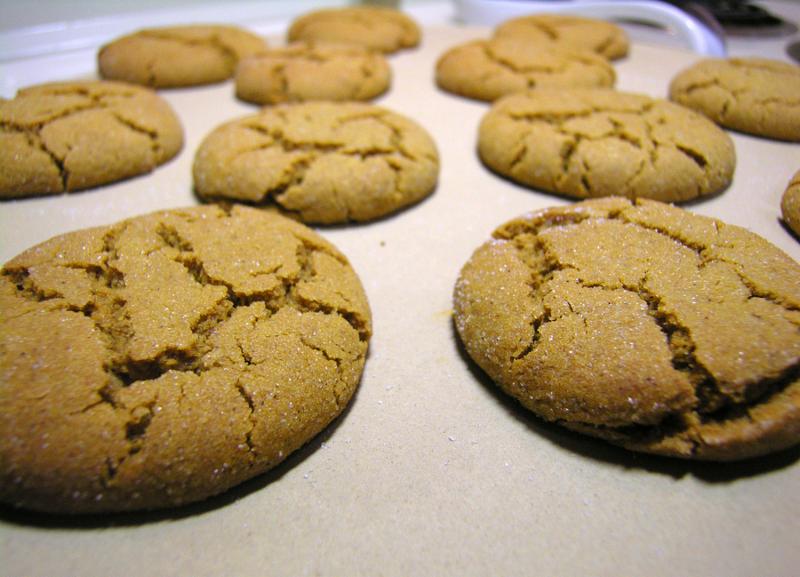
Nothing smells better during the Holidays then ginger cookies baking in the oven. These cookies deliver big on flavor due to the type of sugar – Dark Muscovado. This sugar is partially unrefined evaporated cane sugar and has a strong molasses flavor so it give the cookies a deep gingerbread taste. Dark Muscovado can be found at Fresh Market in Louisville but can be substituted with dark brown sugar if unavailable.

Ginger Raisin cookies – 36 cookies
½ cup raisins
½ cup dark rum
2-1/4 cups White Lily flour
1 tsp baking soda
2 tsp cinnamon
1-1/2 tsp ground cloves
½ tsp ground nutmeg
½ tsp ground ginger
¼ tsp kosher salt
1 cup Dark Muscovado sugar
¼ cup vegetable oil
1/3 cup unsulfured molasses
1 extra large egg
1-1/2 cups chopped crystallized ginger
turbinado sugar for rolling
Place the raisins and rum in a sauce pan on the stove top and over medium heat to a simmer. Remove from the heat and set aside so the raisins can soak up the rum for about 15 minutes. Drain off the remaining rum.
In a large bowl sift the flour, baking soda, cinnamon, cloves, nutmeg, ginger and salt together. In the bowl of an electric mixer beat the dark muscovado sugar, oil and molasses on medium for about 5 minutes. Add the egg and beat for another minute. Scrape the bowl, beat again for another minute and turn the mixer to low. Add the dry ingredients slowly, then increase the speed to medium ad mix until everything is well combined about 2 minutes. Stir in the crystallized ginger and the rum soaked raisins. Place in the refrigerator and chill for 24-36 hours.
Heat the oven to 350 degrees. Scoop the dough into a 1-1/2 inch balls and roll in turbinado sugar. Place on the parchment covered baking sheet about 3 inches apart and bake for 13-15 minutes. Cool on the cookie sheet for a couple of minutes and then cool completely on a rack. Store in an air tight container.
Happy Holidays from Fresh Chef Experience!
by Kathy Douglas | Nov 3, 2014 | Holiday, Side Dishes
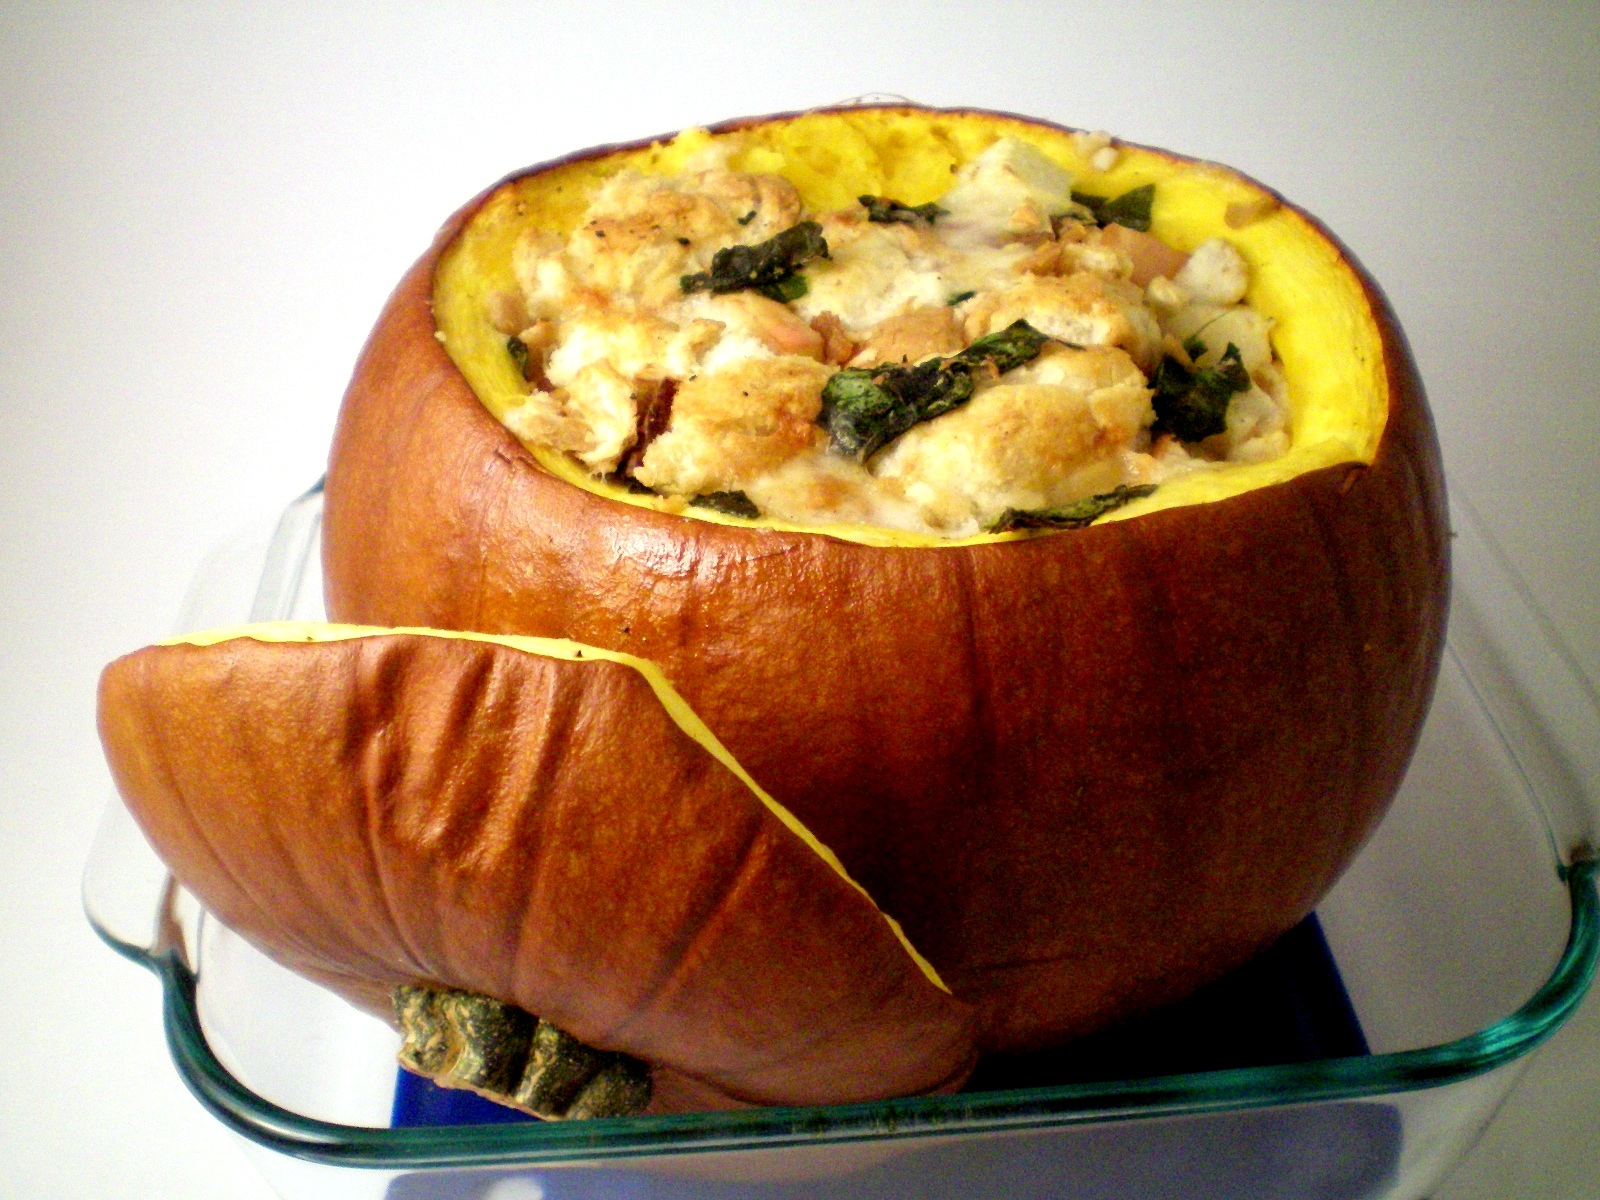
This deliciously adorable little pumpkin will be perfect on any Thanksgiving table! You can spice up this recipe with sausage or bacon, just make sure the meat is fully cooked.

4 oz. stale bread, cut into 1/2-inch cubes
4 oz. cheese, such as Gruyère, Fontina, cheddar, or a combination,
cut into 1/2-inch chunks
2–4 garlic cloves minced
1/4 cup snipped fresh chives
1 tablespoon minced fresh thyme
1/3 cup heavy cream, plus 2 tablespoons
1/2 cup chopped roasted walnuts
1 pie pumpkin, about 3 pounds
Preheat oven to 350°. Toss the bread, cheese, garlic, herbs and nuts together in a bowl. Season with pepper and stir in 1/3 cup of cream. Set aside to rest while preparing the pumpkin. Use a very sturdy knife to cut a cap on the top of the pumpkin. Cut the cap like a Jack-o-Lantern and cut a big enough cap to make it easy to work inside the pumpkin. Scrape out the seeds and strings from the cap and from inside the pumpkin. Season the inside of the pumpkin generously with salt and pepper, and put the pumpkin on a baking sheet or shallow pan. Set the cap aside. If the stuffing is dry, moisten with 2 the remaining tablespoons of cream and stuff inside the pumpkin until full. Place the cap on top of the pumpkin and bake the pumpkin for 90 minutes. Remove the cap and bake 20-30 minutes longer or until everything inside the pumpkin is bubbling and the flesh of the pumpkin is tender enough to be pierced easily with the tip of a knife. The stuffing should register 165 degrees on a food thermometer. Remove from the oven, replace the cap, rest for 20 minutes and cut into wedges to serve.
by Kathy Douglas | Jul 30, 2014 | Frozen Desserts
Ice cream is the favorite summertime treat! Whether you are using store-bought or homemade, the following tips will help to keep your ice cream fresh and tasty. And, give our BROWN SUGAR VANILLA ICE CREAM recipe a try, it’s absolutely delicious!
KEEP IT COLD AT ALL TIMES – I know, sounds redundant, but Ice Cream MUST be kept cold at all times. Once it starts to melt, the ice crystal structure breaks down and it causes the ice cream to melt even faster. This explains why eating an ice cream cone is the most messy at the end. And when these structures are broken, they cannot be repaired. Typically if you try to re-freeze thawed ice cream, it becomes hard and unappealing. After all, it’s that smooth creamy texture we crave, right? Once it melts, it’s done and referred to as “heat shocked.” So, any time you take ice cream out of the freezer you want to put it back as soon as possible.
SCOOP, THEN REST FOR BEST FLAVOR – Ice cream taste better if it sits for a few minutes. Our tastebuds don’t like super cold foods, so give your ice cream a rest, but not in the carton. Take the carton out for a few minutes just until you can scoop it, scoop into bowls, return the carton to the freezer, and then let your scooped ice cream rest for just a minute in the bowls before serving. Please do not microwave ice cream to thaw. Because microwaves heat un-evenly, you can set up pockets of crystals and ruin your ice cream.
DON’T DIP YOUR SCOOP IN WATER – especially dipping the scoop in hot water. Water can freeze on contact with the ice cream and become a crunchy chunk of ice in minutes.
STORE YOUR ICE CREAM SMARTLY – when storing, keep it covered in the coldest part of the freezer. Avoid storing it on the door. Be aware, if for some reason the freezer breaks down, throw out the unfrozen ice cream. Dairy is only safe for long storage as long as it is kept frozen.
Below is a great recipe that can be used in any ice cream maker. If you don’t have an ice cream maker you can make this in a shallow metal pan. Simply cut the recipe in half, pour into a shallow metal pan, place in the freezer and stir every 30 minutes until you reach ice cream texture. If you prepare with this method, you need to consume the ice cream that day. Enjoy!
BROWN SUGAR VANILLA ICE CREAM
2 cups of whole milk
1-1/2 cups of heavy cream
1 cup of dark brown sugar, packed
12 large egg yolks
1/4 cup of sugar
1/4 tsp kosher salt
2 tsp of vanilla extract
Stir milk, cream and brown sugar in saucepan over medium high heat until comes to rolling boil.
Whisk yolks, sugar and salt in a medium bowl until pale yellow and sugar is dissolved.
Place medium metal bowl in a large bowl of ice water with fine mesh strainer.
Add hot cream mixture to egg yolks gradually, whisking constantly to temper the eggs. Return to pan and cook over low heat stirring until the custard coats the back of a spoon. Strain custard into chilled bowl set over ice.
Cool custard, stirring occasionally for 10-15 minutes.
Stir in vanilla to taste. Cover and chill for a minimum of 4 hours or overnight. Can be made 1 day ahead.
For a chocolate chip version:
At the end of your ice cream machine cycle add 1 cup of frozen mini chocolate chips!
|
by Kathy Douglas | Jun 13, 2014 | Entrees
Summertime is one of the busiest times of year. Most home cooks are looking for quick and easy meals while some are looking to use the grill more often to keep the oven heat out of the house.
At Fresh Chef Experience our two Specific-interest based experiences, Great Grillin’ and The Farmers Market Basket are the most request recipes to learn. So I have included a recipe we taught at Williams-Sonoma in May on making Pesto with hardy greens. Pestos with pasta make quick and easy meals. The oven isn’t needed so your kitchen won’t heat up on those hot summer days. Try this version with almost any hardy greens or nut combination.
|
Hardy Greens Pesto with Pasta
12 ounces washed and cleaned hardy greens such as arugula, dandelion, mustard, kale, turnip greens
1 cup olive oil
4 cloves garlic, peeled
6 tbls nuts, lightly toasted, such as walnut or pine nuts
1 1/2 teaspoons sea salt
2 1/2 oz Parmesan or Romano cheese, grated
1 lb dried pasta, cooked to package directions
Put about one-third of the greens in a food processor, blender or Vitamix with the olive oil and chop for a minute, scraping down the sides. Add the remaining greens in two batches, until they’re all finely chopped up.
Add the garlic cloves, toasted nuts, salt, and Parmesan, and process until everything is a smooth puree. Taste, and add more salt if necessary. If it’s too thick, you can thin it with more olive oil.
Cook the pasta according to package directions. Reserve 1/2 cup of pasta water. Add the pasta water to the pesto to create a sauce then toss with the pasta. Top with extra Parmesan.
|
Look for Chef Stu and Chef Kathy at Williams-Sonoma this month on June 28th for Part One of our Great Grillin series. We will be there from 3:00-4:30 – hope you can join us.


Recent Comments